Support Platform:steam

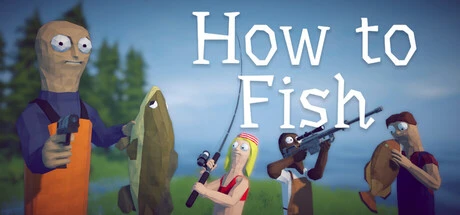
Super Punch Damage in How to Fish turns your bare hands into a high impact super punch option that feels like a real damage boost for every bare fist swing. Instead of tapping weak hits and waiting for enemies to drop, you can unload heavy combo style punches that shred small mobs and finish fleeing fish before they scatter. This is the kind of punch boost that makes island runs feel smoother, because you can clear packs faster, reach bosses quicker, and keep the catch sell upgrade loop moving without constant melee downtime. On Forest Island during a Giant Piranha rampage, you can equip bare hands and chain super punch hits into the big health bar while a shotgun handles the smaller spawns, then watch the boss bar collapse in a clean burst. On Volcano Island, you can soften the Mutated Bowhead Whale with ranged bursts, then switch to bare fist damage for that satisfying closer that feels like a power spike instead of a long grind. In co op lobbies, Super Punch Damage makes tag team moments way more fun, since you and friends can chain punches across multiple targets, open gates faster, and keep pressure on dense mob waves on Rock or Desert islands. The appeal is simple. You get a damage boost that respects your time, lets you finish fights instantly, and keeps the focus on navigation, trick shots, loot value, and the next upgrade. No more awkward weak swings, no more getting surrounded by weak mobs, and no more chasing a boss that keeps regenerating while your fist hits feel underwhelming. If you like How to Fish for the chaotic island combat loop, the super punch feel gives you a cleaner route from spawn to sell to upgrade, with every bare knuckle swing carrying more punch and every boss trigger turning into a faster, more epic moment. That is why players looking for a stronger melee feel and a smoother high damage flow in How to Fish keep coming back to Super Punch Damage for the extra punch boost and the instant satisfaction of ending fights with one clean hit.
Hey fellow anglers in How to Fish, if you have been chasing rare variants, surviving brutal boss encounters, or just refusing to lose progress to one unlucky hit, the Take No Damage experience is the kind of relaxed power fantasy every island run deserves. It basically gives you a God Mode vibe and a true Invuln feel, where your character can wade into danger, tank hits, and keep exploring without the usual panic of watching your health bar vanish. In practical terms, Invuln style protection means boss charges, creature slams, fire, poison, and other environmental hazards stop feeling like instant fail states, so you can focus on positioning, timing, and landing those satisfying trick shots instead of reloading saves every time a Spider Crab gets spicy. For solo players, No Damage runs are a huge quality of life boost on Hard difficulty, because you can push through the full island circuit, test risky routes, and farm late game content without the constant stress of cheap deaths. In coop lobbies, it turns chaotic eight player sessions into a smoother grind, letting your group push boss fights, chase elusive fish, and experiment with risky strategies while still having fun. The best part is that it does not just make you bulletproof in a boring way. It changes how you approach the map, how you engage aggressive fish, and how much longer you can stay in the zone. If your biggest pain points are getting one shot, losing a long run to a single mistake, or feeling punished when you finally line up a rare variant, this is the kind of setup that keeps the session feeling fresh and confident. Whether you want a chill cruise through the island, a low stress coop farm, or a high confidence push against the toughest encounters, Take No Damage gives you the breathing room to play How to Fish the way you actually enjoy it, with less frustration and more time spent catching, exploring, and flexing on those hard to find variants.
Hey angler, if you have ever been mid fight in How to Fish and your stomach starts screaming before you can reel in the next big catch, Never Hungry is the kind of gameplay flow that keeps your session smooth and your cast rhythm locked in. Instead of pausing to eat random clams, worry about survival checks, or waste bait while your hunger bar drains, you can stay focused on the catch fight sell loop from the first cast to the final boss pull. That makes hunger management feel almost invisible, because you are not juggling food, stamina, and progression at the same time. You can dive straight into island runs, test better fishing lures, chase NPC chains, and keep your momentum alive even when the map throws mutated bowhead whales, giant piranhas, or a tricky spider crab key grab at you. For players who care about boss progression, Never Hungry is especially handy when you are preparing for island two leech run or the final volcano area, since you can reel in a tuna, fight the boss without getting interrupted, then head to the grill for that extra multiplier without ever feeling peckish. It also helps when you are upgrading your knife or shotgun, because less downtime means more fish, more upgrades, and more chance to lock in those million dollar hauls. The best part is that it fits the How to Fish community vibe, where players want to feel like a boss fishing rod, not a hungry angler stopping every five minutes. Whether you are optimizing fishing lures for a specific zone, planning boss progression around rare spawns, or simply trying to keep hunger management from ruining a good session, this setup lets you play the game the way it was meant to be played, one long, satisfying cast after another. If your goal is to move through islands faster, keep your focus sharp during tense fights, and turn every pull into pure flow, Never Hungry gives you the breathing room to do exactly that without breaking the rhythm.
In How to Fish, the Heal Player boost is the kind of quick save that turns a chaotic boss fight into a clean comeback instead of another respawn screen. When your health bar is flashing red after a piranha spike, a seagull steal, or a wild island transition, using Heal Player lets you snap back to full energy and keep the squad moving. It is especially useful for co op players who want a How to Fish Player Heal moment without waiting for a safe corner, because the effect lands fast enough to keep your punch combo alive and your teammate aimed at the next weak spot. If you are hunting giant piranha on Forest Island or dealing with the mutated bowhead whale on Volcano, a Healed Player state can be the difference between escaping with a rare catch and losing progress mid run. Think of it as the friendly hand that says we are not wiping here, because you can pop the Heal Player, watch the character straighten up, and continue the catch sell upgrade loop that pushes you to the next island. For players who love long island transitions, gambling nights, or reckless boss attempts, this How to Fish Heal Player option reduces the stress of early game fragility and makes every risky play feel more like a controlled comeback. It also pairs well with upgraded rods, shotguns, and lure matching setups, so you can focus on trick shots, better weapons, and smoother progression instead of constant respawns. Whether you are the main angler, the support player, or the friend who keeps the lobby from melting, a How to Fish Player Heal effect gives you that satisfying moment where the team stays in the fight and the run does not stall. If you have been searching for a Healed Player style boost that feels responsive, easy to use, and perfect for chaotic runs, this How to Fish Heal Player setup is a simple way to keep your energy high, your confidence up, and your next boss attempt feeling more like a win than a gamble.
If you are playing How to Fish and your stomach keeps stealing focus from the best catches, Restore Fullness is the kind of quality of life upgrade that makes the whole run feel smoother. It instantly restores your fullness bar the moment you need it, so a Fullness Restore can happen right before a boss fight, during a long reel, or while you are moving between islands. That matters because hunger interruptions can ruin a whale chase, slow your sell loop, or make co op sessions feel messy when someone keeps stopping to eat. With a Hunger Fix in place, you can stay locked in on casting, baiting, reeling, and upgrading without constantly hunting for clams, scraps, or random food drops. For early game players, a Saturation Boost removes the annoying grind of running back to food just to keep the bar green. A Saturation Boost also helps when you are switching islands quickly and do not want to waste time searching for food. You can keep farming lures, unlocking new areas, and building value without the constant pause. For late game players, the real power is boss prep. Imagine summoning the Volcanic Whale or dealing with the Giant Piranha, then reeling with a clean fullness bar instead of worrying about a sudden hunger spike. You can charge the line, keep tension stable, land the drop, cash out, and move to the next island with momentum. In co op, calling out a quick Fullness Restore keeps the crew focused and makes long trips to the Desert or Swamp feel less draining. The best part is how naturally it fits into the How to Fish action loop. You catch, you fight, you sell, you upgrade, and you keep going. A Hunger Fix does not feel like a random break in the flow. It feels like your character finally has the stamina to match the pace of the game. When you want a clean Restore Fullness moment before a big fight, it keeps the session tight. Whether you are chasing achievements, testing new lures, or just trying to enjoy the island hopping without food anxiety, Restore Fullness gives you a cleaner session and a more satisfying progression path. It is the kind of small quality of life change that makes a big difference when you are deep in a run.
Yo crew, if you are stuck in How to Fish with a low balance while the best rods, bait, and island upgrades are just one tap away, the Add Money flow is the kind of wallet boost that keeps the session moving. It feels like a clean cash injection straight into your coin stash, so you can stop staring at empty pockets and start buying the gear that actually changes the run. Early loops can be annoying when you need extra coins for seagull quests, trap upgrades, or a quick bait refresh, and a currency influx can turn that slow grind into a smooth progression chain. You can use the extra cash to clear a boss fight without worrying about running dry, drop into a new island with better tackle, or keep the fishing line full while the map expands. The best part is that it keeps the game feeling alive instead of turning every catch into a waiting game. When you have a steady wallet boost, you can experiment with different rods, test expensive bait, and push toward the next level without pausing to farm the same spot for minutes. It also helps when you want to keep the momentum during a speedrun style session, because you are not stuck at a low balance while the island is begging for upgrades. Think of it as the extra coin flow that lets you play How to Fish the way you actually want to play, with more action, more choices, and fewer boring cash checks. If you have been trying to get through the early money wall, survive a tough boss, or unlock the next island faster, this Add Money style cash injection can make the whole loop feel way smoother. You get to keep the immersion high, keep the catches coming, and keep your wallet full enough to buy the next upgrade before the fun fades. That is why players love a clean currency influx that supports the grind without breaking the flow, especially when the game is pushing you to spend coins on rods, traps, bait, and island improvements. It turns a frustrating low balance moment into a quick boost, so you can stay in the zone, chase bigger fish, and keep the How to Fish session feeling fresh, fast, and rewarding.
Imagine opening How to Fish and finally having enough Sub Money to stop selling every tiny fish just to afford the next rod, lure, or upgrade. The How to Fish Sub Money flow is built for players who want to play at full speed, with instant cash that supports premium rods, weapons, boat upgrades, boss lures, radar upgrades, and new island access without the boring sell and wait loop. The best part is how it connects to the action you already love, because every creature kill can turn into a bigger profit, and that is where Killscore starts to feel powerful. When you line up a Killshot on a group of fish or a tougher target, your rewards feel more satisfying, and your cash stack grows faster. That kind of momentum is perfect for later islands, especially after unlocking the Grillmaster quest, where explosive style finishes and stylish kills can make your bank account feel alive instead of empty. Early islands can leave you broke after the starter rod and basic lures, but this Sub Money path lets you skip the grind and jump into boss fights, cooperative adventures, and 100 percent collection goals. You can finally afford Shotgun bullets, better bait, boat improvements, and the premium gear that makes How to Fish feel like a real adventure instead of a money test. The experience is smoother, faster, and more fun, because you are not waiting for the game to catch up with your skill. Whether you are chasing a clean Killshot, stacking Killscore for bigger sell value, or working through the Grillmaster content with friends, the Sub Money boost keeps your progress moving. It helps you test new strategies, try riskier lures, and explore more islands without worrying about running dry after one big purchase. For players who want How to Fish to feel rewarding from the first minute, this How to Fish Sub Money setup gives you the cash freedom to play the way you want, with less frustration and more style. If your goal is to dominate boss fights, complete collections, and enjoy the full How to Fish experience without endless grinding, this is the kind of Sub Money flow that makes the game feel fresh, fast, and genuinely exciting.
If you have been stuck in How to Fish because your wallet keeps running empty, Set Money is the kind of cash boost that changes the whole run. SetMoney lets you lock in the exact amount of cash you want before you head out, so you can buy better gear, upgrade your boat, and keep exploring without waiting for the usual grind. MoneySet works like a quick reset for your bank balance, giving you a clean starting point whether you are preparing for a boss quest, a volcano trip, or a long island hopping session. InfiniteMoney takes that idea further by keeping your funds feeling endless while you test routes, catch rare fish, and sell cooked creatures at higher value. The best part is how it fits into actual gameplay. You can spawn near the volcano, slam creatures into lava for premium sales, then use Set Money to bank a big amount before the next challenge. It removes the annoying early game shortage that usually freezes your progress, so you can focus on trick shots, better weapon chains, and discovering new islands instead of staring at a low balance. For players aged 20 to 30 who like fast paced sessions, this kind of cash control feels less like a boring number and more like a smooth power up for your whole playstyle. You can flex with millions, test expensive builds, or simply skip the frustration of repeated fishing loops. Whether you are searching for SetMoney in How to Fish, comparing MoneySet options, or looking for InfiniteMoney style cash freedom, this introduction shows how the feature can make your sessions feel more relaxed and more rewarding. It also helps when you want to experiment with different strategies without worrying about every purchase. The result is a cleaner flow between catching, selling, upgrading, and moving to the next area. If your main pain point is that cash shortages interrupt your fun, Set Money gives you the breathing room to play the way you actually want to play. It keeps the game feeling fresh, lets you chase bigger rewards, and makes each island run feel less like a chore and more like a smooth adventure.