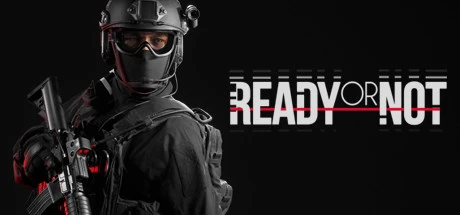
Support Platform:steam

Ready or Not drops you into the heart of high-stakes SWAT operations where every bullet counts, but unlocking the power of Unlimited Health—often hyped as invincibility or god mode—shifts the game into a whole new playground. This mechanic lets you soak up chaos without fear, turning Los Sueños’ relentless firefights into opportunities to test bold moves, refine squad dynamics, or just soak in the game’s gritty atmosphere. Imagine charging through a drug den stacked with enemies, your health bar locked solid as you experiment with taser-only takedowns or flanking maneuvers that’d usually end in mission failure. Unlimited Health isn’t just a safety net; it’s your ticket to stress-free exploration, letting you dissect derelict apartments or shadowy nightclubs without the pressure of perfection. For rookies, it flattens Ready or Not’s punishing learning curve—practice weapon handling, breaching techniques, and comms until muscle memory kicks in. Veterans can geek out on tactical creativity, swapping lethal force for experimental playstyles or squad coordination drills that’d otherwise demand endless retries. Even casual players benefit, transforming tense scenarios into a chill experience where the story and worldbuilding take center stage. The beauty of this system lies in its simplicity: infinite health means more time mastering movement, testing loadouts, and dissecting enemy AI patterns without the frustration of respawning. Whether you’re diving into Los Sueños’ underworld for the first time or looking to sharpen skills for unmodded runs, Unlimited Health reshapes the game into a sandbox where mistakes fuel growth instead of ending it. This isn’t just about surviving longer—it’s about redefining how you engage with Ready or Not’s intense realism, mission by mission.
Ready or Not players know that every second counts when navigating high-stakes SWAT missions, and Unlimited Chem Lights redefine how you tackle darkness and coordination challenges. These glowing tools are essential for lighting up abandoned buildings, dimly lit apartments, and maze-like drug dens, letting you focus on tactical precision without worrying about running low on resources. Whether you’re clearing rooms during a bank heist or signaling safe zones in a hostage rescue, Unlimited Chem Lights ensure you’re always ready to mark critical paths, secure areas, and highlight threats or civilians with consistent illumination. Gamers who’ve struggled with rationing standard chem lights will appreciate the freedom to deploy them liberally, turning dim environments into well-lit battlegrounds while boosting squad cohesion and solo play efficiency. Tactical teams thrive when marking cleared rooms becomes second nature, avoiding ambushes and miscommunication, while solo operators use glowing trails to track progress and minimize backtracking. In Ready or Not’s intense firefights, maintaining visibility in stairwells or vaults is crucial—Unlimited Chem Lights eliminate inventory anxiety, letting you prioritize strategy over scavenging. Players craving seamless marking during multi-floor raids or high-pressure extractions will find this feature transforms their gameplay, ensuring every hallway, exit, or trap zone stays highlighted. The tactical edge of unrestricted illumination shines brightest in chaotic scenarios: imagine dropping chem lights to secure a vault’s perimeter during a bank heist or lighting up a hostage room’s corners to spot hidden dangers. Ready or Not’s punishing difficulty meets its match with this game-changing tweak, empowering squads to synchronize their movements and solo runners to conquer sprawling maps. By removing supply limits, you unlock creative tactical solutions—mark enemy positions, build safe routes, or flood shadows with light to outmaneuver opponents. Whether you’re coordinating a 4-player co-op or testing your skills alone, Unlimited Chem Lights amplify your ability to adapt, communicate, and dominate. This isn’t just a tweak—it’s a tactical evolution that turns survival instincts into calculated mastery, ensuring you never fumble through darkness again in Los Sueños’ unforgiving world.
Ready or Not fans know every bullet matters in its heart-pounding tactical showdowns, but imagine dominating scenarios without worrying about empty mags—enter the Infinite Ammo No Reload gameplay adjustment that’s reshaping how players approach high-stakes ops. This tweak transforms your arsenal into a relentless force, letting you spray suppressive fire while maintaining clutch positioning during intense room clears or boss rushes. Tactical enthusiasts swear by this Ammo Mod for stress-free training drills, letting you perfect hip-fire accuracy or test aggressive push strategies without breaking rhythm. Whether you’re a rookie struggling with ammo conservation or a vet craving cinematic bullet sponges in modded servers, the No Reload feature turns pressure-cooker moments into smooth executions. Picture holding down a hallway in a hostage rescue mission without fumbling for reloads, or blazing through breach drills as your fire rate dictates the pace—this adjustment isn’t just about spamming bullets, it’s about mastering movement and team synergy when every second counts. Firearm fans love how Infinite Ammo amplifies Ready or Not’s core chaos, letting you pivot from spray-and-pray to surgical precision without reload penalties interrupting your flow. While purists might argue about realism, the mod’s flexibility shines in custom maps and community events where creativity trumps vanilla mechanics. Players stuck in tight spots during campaign runs or chaotic quick matches find the Ammo Mod removes frustrating retreats to reload, keeping adrenaline levels maxed. Whether you’re chasing flawless mission completions or just want to vibe with friends in a bullet-hell sandbox, this tweak turns resource management into a non-issue—so you can stay locked in on angles, callouts, and those sweet one-tap takedowns that make Ready or Not’s firefights so satisfying. Ready or Not’s evolving meta means players are always hunting efficiency boosts, and Infinite Ammo No Reload delivers that edge without breaking immersion, turning tense standoff moments into controlled demolition masterclasses.
Ready or Not throws you into adrenaline-fueled raids where every bullet counts, and mastering weapon mechanics can mean the difference between mission success and catastrophic failure. If you're tired of wrestling with ADS recoil while lining up critical shots, this gameplay tweak hands you a tactical edge that redefines how you approach firefights. Imagine keeping your crosshair locked on target through entire magazines, whether you're breaching a meth lab or providing overwatch across a sniper nest. The No ADS Recoil system completely neutralizes muzzle climb and lateral kick during sighted fire, letting your accuracy shine when hostage takedowns demand surgical precision or when spraying suppressive fire during dynamic building clears. Tactical shooters know that recoil management often steals focus from positioning and threat prioritization, but this feature lets you channel all your energy into reading enemy movement and executing flawless breaching strategies. Newcomers will love how it smooths the learning curve for high-recoil performers like the M4A1, while seasoned operators can refine their movement-canceling techniques against complex AI behaviors. Whether you're tracking targets through smoke-filled hallways or needing pinpoint follow-up shots during chaotic shootouts, removing ADS-induced shake turns your weapon into a laser-guided extension of your will. Veterans call it 'firefight finesse' - maintaining accuracy under pressure without fighting your gear. This isn't just about landing headshots; it's about developing combat rhythm where your weapon handling syncs perfectly with your tactical instincts. From CQC room entries requiring controlled burst patterns to long-range duels demanding steady crosshair placement, the No ADS Recoil advantage keeps your shots grouping tighter than a SWAT team's formation. The game's punishing accuracy checks still test your fundamentals, but now you can prove your skill without recoil throwing off your timing. Players report faster target transitions and cleaner multi-kill sequences when they eliminate sighted fire drift, letting them focus on the real challenges: enemy positioning, cover management, and maintaining that crucial first-shot advantage. When the mission timer's ticking down and crosshair stability makes or breaks your entry plan, this feature becomes your secret weapon for tactical dominance.
In Ready or Not, mastering the chaos of high-risk operations demands gear that adapts to the unpredictable. Armor Piercing Bullets, often dubbed AP Rounds, are the unsung heroes when facing suspects kitted out in tactical vests or ceramic plating. These specialized rounds slice through armor like butter, letting you neutralize threats faster and keep your team’s momentum rolling. Whether you’re storming a bank heist map like Buy Cheap, Buy Twice or breaching a terrorist hideout in Valley of the Dolls, AP Rounds are your go-to choice for punching past defenses that standard ammo would bounce off. Gamers know the frustration of watching unarmored foes drop in one shot while armored enemies soak up bullets like it’s nothing – that’s where this penetrating ammo shines, turning drawn-out firefights into quick, decisive takedowns. Pair them with high-penetration weapons like the HK416 or FN P90 TR to dominate the battlefield, especially in hostage rescue scenarios like Thank You, Come Again where every second counts. Unlike Jacketed Hollow Points that expand on impact, AP Rounds trade splash damage for armor-cracking efficiency, making them a no-brainer for intel-led missions where enemy armor is confirmed. They’re not just about raw power; these anti-armor bullets optimize ammo economy in Ready or Not’s punishingly realistic loadout system, ensuring you don’t burn through magazines while chipping away at plate-wearing targets. The result? Cleaner breaches, safer engagements, and bragging rights when you drop suspects before they can even react. Whether you’re a rookie learning the ropes or a seasoned SWAT vet chasing flawless mission scores, AP Rounds solve the headache of armor-soaking encounters while keeping your playstyle aggressive and adaptive. Just remember – save the hollow points for unarmored squishies and unleash penetrating ammo when the game throws its toughest armored opposition at you. Your K/D ratio (and teammates) will thank you.
In Ready or Not, understanding damage multiplier mechanics separates rookie misfires from tactical precision. This invisible system governs how every round you fire translates into actual stopping power against suspects decked out in ballistic armor or scrambling through chaotic environments. When you're storming a fortified meth lab or clearing a crowded bank vault, your ammo effectiveness against level 3+ armor isn't just about raw stats—it's about how damage multipliers interact with your weapon choice and shot placement. Load 5.56 AP rounds to punch through reinforced body armor or switch to frangible bullets when breaching doors to minimize splash damage. Veterans know that critical damage multipliers make headshots with SMGs like the MPX absolutely devastating in close quarters, while precision rifles shine when exploiting those sweet spot modifiers at extended ranges. The real game-changer? Recognizing how armor penetration values stack against different suspect protection tiers. That JHP round might be your go-to for soft targets, but throw it against a heavily armored gang member and you'll watch your bullets ping off like popcorn. This knowledge isn't just for loadout junkies—it's survival math. Want to convert more engagements? Study how multipliers scale with impact zones: chest shots against unarmored thugs work fine with standard FMJ, but tracking those critical headshot multipliers turns your carbine into a one-tap takedown machine. New players often underestimate how ammo effectiveness curves change per map—those shotgun slugs that dominated the Liquor Store's tight corners won't help when you're pinned down by armored foes at the Stadium. The pros adjust their playstyle to exploit damage multipliers: stacking AP rounds for armored boss fights, using critical damage hotspots during hostage rescues, and optimizing ammo effectiveness for each mission's specific threats. When you're staring down a level 4 armored target mid-firefight, you'll wish you'd paid attention to these mechanics during your loadout selection. It's not about min-maxing—it's about ensuring every trigger pull counts when bullets start flying. Grasp these principles and watch your mission scores skyrocket from B-rank fumbles to S-tier shutdowns. No more wasted magazines or panic reloads—just calculated damage application that turns frantic engagements into surgical operations. The game's physics engine doesn't lie, and once you're speaking its language, those previously tanky suspects will start looking awfully fragile.
In the adrenaline-fueled world of Ready or Not, mastering weapon performance can be the key to survival when facing unpredictable threats. The Enable Rate of Fire mechanic transforms your loadout by significantly increasing rounds per minute, giving you the edge during chaotic close-quarters combat situations like breaching meth labs or engaging in hostage rescue operations. This tactical enhancement allows players to pump out bullets faster than standard configurations, making it easier to suppress hostile targets while creating openings for aggressive pushes or team maneuvers. Gamers diving into intense firefights will notice how this fire rate boost helps maintain pressure, especially when countering armored opponents who require multiple well-placed shots to neutralize. While the increased rate of fire shines in scenarios demanding speed and aggression, users should stay mindful of amplified recoil patterns and accelerated magazine consumption that come with this high-octane tweak. Competitive players in multiplayer modes might find this feature particularly valuable for out-damaging opponents during sudden engagements, though balancing realism with effectiveness becomes crucial when coordinating with teammates. Weapon modification enthusiasts will appreciate how this system blends customization with authentic SWAT simulation mechanics, offering a strategic trade-off between raw firepower and control. Whether you're clearing tight corridors or executing high-risk entries, optimizing your fire rate could mean the difference between taking the fight to enemies or getting caught in a lethal stalemate. Remember to pair this enhancement with proper grip techniques and reload discipline to maximize its potential without compromising tactical versatility. The Ready or Not community often debates the best applications for rapid fire setups, making this a hot topic for players seeking performance upgrades that align with their aggressive playstyles in the game's unforgiving environments.
In Ready or Not, understanding and adapting your weapon's Rate of Fire can be the difference between mission success and a deadly firefight. This core mechanic lets players toggle between fire modes like semi-automatic for precision shots or full-automatic for unleashing suppressive firepower, giving you full control over how your weapon performs in dynamic situations. Whether you're storming a barricaded room in close-quarters combat (CQC) or picking off enemies from a distance, adjusting your fire mode impacts bullet spread, recoil management, and overall tactical effectiveness. For example, full-auto bursts with high cyclic rate might overwhelm hostile threats during intense breaching operations, while semi-auto ensures clean headshots when hostages are on the line. New players often struggle with split-second fire mode switches under pressure or misjudging when to conserve ammo versus going all-out, but mastering these decisions sharpens your gameplay and minimizes collateral damage risks. The cyclic rate of your weapon also plays a key role in burst fire strategies—perfect for mid-range engagements where controlled aggression keeps enemies pinned without wasting rounds. Ready or Not veterans know that adapting your Rate of Fire to the mission's demands is crucial for surviving chaotic scenarios like hostage rescues or urban warfare, where split-second choices define your tactical edge. By experimenting with fire mode transitions during training drills and real operations, players build muscle memory to outmaneuver opponents and maintain situational dominance. Whether you're a run-and-gun operator or a methodical tactician, optimizing your weapon's fire rate mechanics turns raw firepower into calculated precision. Dive deeper into fire mode mastery to unlock your loadout's full potential and become the operator your squad needs!
In the heart of the chaos-filled action of Ready or Not, the Replenish Magazine mechanic emerges as a strategic lifeline for players navigating high-stakes scenarios. This innovative gameplay element transforms how you handle ammunition by letting you retrieve magazines dropped during reloads, creating a dynamic where every partial clip becomes a potential comeback tool. Whether you're clearing a hostile-packed map or surviving a prolonged gun battle, mastering Fast Reload techniques to drop spare mags while shouting 'Magazine Pickup available!' to teammates elevates your tactical efficiency. The system shines brightest when resupply points are scarce – imagine recovering a 75% loaded mag mid-operation after a brutal SWAT-style breach, turning a desperate last-stand moment into a coordinated victory. By integrating intuitive Ammo Management into core mechanics, the feature eliminates frantic ammo checks while fostering squad synergy through shared resources. Players using identical weapon types can passively support each other, transforming traditional fireteam dynamics into real-world inspired teamwork where shouted callouts like 'Grab my dropped mag!' become game-saving communication tools. This mechanic directly answers gamers' frustrations about running dry during critical engagements, particularly in sprawling maps where every bullet truly counts. The beauty lies in its simplicity – double-tap R to execute a Fast Reload that drops your current magazine, creating opportunities for both personal and team-based tactical advantages without breaking immersion. From clutch situations requiring precise shot management to extended engagements demanding calculated resource allocation, Replenish Magazine redefines how modern tactical shooters handle ammunition logistics while keeping the adrenaline pumping. Players discover that maintaining ammo reserves through magazine recovery becomes second nature, making those heart-pounding moments where you shout 'Cover me while I pick up mags!' feel like authentic SWAT team coordination.
In the high-stakes chaos of Ready or Not, the Replenish Grenades mechanic transforms your approach to urban combat by ensuring your arsenal never runs dry. Imagine storming a dimly lit meth lab or navigating a sprawling corporate complex where every corner hides armed threats—now you can spam grenades relentlessly without second-guessing your next move. This game-changing mechanic lets you unleash infinite grenades to blind adversaries with flashbangs, cloak your team's advance in smoke, or blast through barricades with frags, turning tense firefights into opportunities for creative playmaking. Gamers who've cursed at seeing their last grenade icon disappear mid-operation will appreciate how unlimited grenades eliminate inventory anxiety, letting you focus on executing precision takedowns or chaotic room entries. Whether you're coordinating a four-man stack on a fortified bank vault or solo-clearing a hostage situation in a crowded nightclub, grenade spam becomes your ultimate force multiplier. Flashbang-heavy strategies shine brightest in multi-room scenarios where stunning enemies in sequence creates safe pathways for breaching, while smoke grenades let squads reposition mid-engagement without taking suppressive fire. The frag spam capability? Perfect for collapsing enemy cover in tight urban layouts or forcing surrender scenarios during standoff situations. Players experimenting with grenade arc techniques or testing aggressive push tactics will find this mechanic accelerates skill development, removing resource management constraints that normally throttle experimentation. For streamers chasing viral takedowns or competitive teams refining entry protocols, the ability to maintain pressure through continuous grenade deployment reshapes mission dynamics—no more holding back that clutch throw when you need it most. This feature particularly appeals to tactical thinkers who want to layer effects like flash-smoke transitions or combine explosive damage with breaching strategies, turning Los Sueños' unpredictable encounters into calculated spectacles. Whether you're countering ambushes in narrow hallways or creating distraction zones during high-risk raids, the freedom to spam grenades without cooldowns or ammo limits makes every operation feel like a well-rehearsed playbook execution. Ready or Not veterans will immediately recognize how this mechanic alleviates the frustration of managing limited supplies during prolonged engagements, while newcomers gain a safety net to practice without penalty. The real magic emerges in dynamic environments like multi-story malls or industrial zones where terrain manipulation through grenades becomes an art form—chain tosses to create cascading effects or blanket entire districts in disorienting chaos. By removing traditional ammo restrictions, Replenish Grenades empowers players to prioritize strategy over scarcity, making it a must-experience mechanic for fans of intense tactical simulations.
In the adrenaline-fueled world of Ready or Not, the Drop Enemy Weapons feature becomes your ultimate ally when navigating high-stakes scenarios that demand precision over brute force. This system kicks in when suspects surrender or lose their composure during intense raids, making them ditch their firearms and submit to restraint. Whether you're storming a hostage-filled dorm or clearing a chaotic safehouse, leveraging this mechanic opens doors to non-lethal arrests that boost your mission scores while keeping your S rank intact. Players chasing perfection will find that every successful weapon drop—triggered by smart use of tools like flashbangs, tasers, or pepperball launchers—translates to cleaner ops and higher tactical credibility. The real magic happens when you combine split-second timing with gear mastery; imagine blinding a room with a flashbang to create multiple weapon drops simultaneously or using the optiwand to scout threats before deploying less-lethal solutions. Gamers who embrace surrender dynamics and weapon drop opportunities often discover deeper immersion in their SWAT simulations, transforming chaotic firefights into calculated operations where zip-tying suspects becomes as satisfying as pulling off a flawless breach. While tracking dropped weapons in smoke-filled environments or high-pressure moments might initially feel tricky, the game rewards practice through training missions that sharpen your ability to identify surrender cues and execute less-lethal takedowns. Veteran players swear by coordinating squad commands to pinpoint dropped gear mid-operation, ensuring no opportunity for clean arrests slips through the cracks. For those chasing mission objectives that penalize casualties, this mechanic becomes your secret weapon—literally. By prioritizing weapon drops over traditional engagements, you'll not only align with Ready or Not's realistic law enforcement simulation but also unlock new layers of strategic gameplay where every pepper spray blast or taser shot carries meaningful consequences. Whether you're dodging civilian casualties in hostage situations or perfecting your less-lethal loadout for maximum efficiency, mastering the art of weapon drops transforms how you experience this intense tactical shooter. The community's buzz around 'surrender mechanics' and 'non-lethal dominance' reflects this feature's role as a cornerstone of Ready or Not's gameplay philosophy—where tactical intelligence shines brighter than spray-and-pray tactics. As you dive deeper into the game's mission-critical challenges, remember: the most elite operators know that securing surrendered suspects and managing weapon drops effectively separates casual players from true tacti-cool professionals.
Ready or Not players know how critical it is to stay sharp during intense raids and hostage rescue missions, and understanding Field of View settings could be the game-changer you've been missing. Whether you're breaching doors in tight quarters or holding angles across sprawling maps, FOV adjustment lets you tweak your perspective to match your playstyle and screen setup. Newcomers might stick to the default Field of View, but veterans swear by customizing this setting to gain better peripheral awareness or lock down those precision shots. A wider FOV like 100-110 degrees opens up your surroundings, making it easier to spot enemies lurking in corners during close-quarters combat while room clearing or navigating multi-level buildings. On the flip side, dialing down to a lower Field of View between 70-90 degrees brings targets closer for snappier headshots during long-range engagements, though some players find this feels restrictive on larger displays. The real magic happens when you balance these extremes - maybe 85-105 degrees works best for your ultrawide monitor setup, giving you enough environmental awareness without warping your vision during firefights. Gamers with motion sickness often discover that finding their sweet spot for FOV adjustment smooths out those intense moments, reducing eye strain when tracking multiple threats. Competitive players obsessed with optimizing performance will love how tweaking Field of View impacts both situational awareness and aiming efficiency, especially when transitioning between tight hallways and open courtyards mid-mission. While some tactical FPS fans prefer higher FOV settings for that 'bullet-time' dodging effect during close combat, others prioritize visual clarity for tactical breaching operations. Ready or Not's FOV customization isn't just about immersion - it's about creating a personalized gameplay experience that adapts to different maps and roles. Whether you're struggling with distorted visuals on a curved monitor or feeling blind spots during dynamic shootouts, experimenting with Field of View settings helps you dominate in both CQB and overwatch scenarios. From navigating hostage situations to executing coordinated takedowns, getting your FOV adjustment dialed in turns pixel-perfect positioning into a tactical weapon.
Ready or Not players know how frustrating locked barriers can be during high-stakes SWAT operations, but mastering the art of seamless entry just got easier with this revolutionary gameplay mechanic. Imagine breezing through barricaded areas without wasting precious seconds hunting for keys or risking explosive breaches that might trigger traps. This dynamic feature transforms your tactical approach by providing free access to all locations, letting you focus on room clearing strategies and suspect neutralization instead of scavenging limited lockpicks. Whether you're uncovering hidden collectibles in complex environments, chasing speedrun records, or practicing entry tactics in training mode, the door unlocking capability becomes your secret weapon for domination. Gamers who love discovering Easter eggs will appreciate how this functionality lets them explore every inch of map layouts without resource management headaches. Competitive players aiming for top leaderboard positions can shave critical seconds off mission times by eliminating lock-related delays. The system particularly shines in pressure-filled scenarios where traditional methods might leave you stuck mid-operation, making it perfect for those who prioritize smooth progression and strategic execution over inventory micromanagement. By removing artificial barriers that typically slow down momentum, this innovative mechanic empowers you to maintain tactical superiority throughout your gameplay sessions. From navigating hostile environments to optimizing room scouting efficiency, this built-in advantage reshapes how you interact with the game world while staying completely within the spirit of immersive SWAT simulation. Whether you're tackling intense missions solo or coordinating team strategies, the open all doors functionality proves itself as the ultimate force multiplier for modern players seeking uninterrupted action.
In the adrenaline-fueled world of Ready or Not, players are constantly seeking ways to gain an edge during intense SWAT operations. Imagine being able to instantly relocate to any non-player character whether it's a fleeing suspect or a vulnerable hostage without wasting precious seconds navigating sprawling environments. This game-changing mechanic transforms how you approach high-risk scenarios by eliminating movement delays and letting you focus on split-second decisions. Hostage rescue missions become dramatically more manageable when you can teleport directly to civilians trapped in multi-floor buildings while pursuing targets feels effortless as you close the distance in an instant. The tactical advantage becomes undeniable during firefights where rapid repositioning lets you flank enemies or reinforce teammates faster than traditional movement allows. Gamers battling tight mission timers and complex level designs will appreciate how teleporting to NPCs streamlines their workflow reducing the stress of map memorization and pathfinding. Whether you're breaching a fortified location or chasing down a suspect through alleyways the ability to warp to key characters keeps the action flowing without frustrating pauses. This functionality particularly shines in chaotic moments when every second counts and manual traversal would mean mission failure. Players discover creative applications daily from securing hostages before they get injured to intercepting AI-controlled threats mid-retreat. While mastering the controls takes practice the payoff is immense allowing you to execute strategies that feel almost unfair. Ready or Not's immersive simulation of police tactics already tests your reflexes and teamwork but adding instant teleportation mechanics turns the pressure into pure gameplay satisfaction. Just picture yourself teleporting to a sniper position overlooking a suspect's hideout or materializing beside a hostage the moment they scream for help – that's the level of control this system offers. It's not just about convenience but about creating unforgettable 'gotcha' moments that keep you coming back for more action-packed rounds.
RON Mods: Infinite Ammo, No Reload, Unlimited Health for Tactical Domination!
Mods Ready or Not : Découvrez les Astuces Épiques pour un Gameplay Ultime
Mods Ready or Not: Trucos Épicos y Personalización Táctica para Dominar Misiones
레디 오어 낫: 전술적 자유를 확장하는 수정 도구로 스트레스 없는 하드코어 FPS 경험!
Ready or Notのカスタム設定でリアルなSWAT体験を極める!無限弾薬やノーリコイルで連射ブースト
Ready or Not: Mods Táticos Munição Infinita, Saúde Ilim e Taxa Turbo
Ready or Not 無限火力+超級血量!掌握戰場神技無腦剛槍爽度破表
Моды для Ready or Not: Бесконечный боезапас, здоровье и ускорение
Ready or Not: حيل ملحمية للاعبين العرب - نيران مستمرة وصحة خارقة وتحكم بالسرعة
Ready or Not: Mod Epici per Gameplay Fluido e Scontri Letali
You may also enjoy these games